Installing an Under Sink Water Filter: A Step-by-Step Guide
As you embark on the journey to purify your household water, you’ve decided to take the plunge and install an under-sink water filter. This is a wise decision, particularly if you have concerns about the quality or taste of your tap water. Think of your current tap water as a raw ore; it might contain valuable minerals, but it also carries the potential for impurities. An under-sink filter acts as a sophisticated refining process, transforming that everyday water into a pristine, drinkable elixir. This guide will walk you through the installation process, demystifying each step and empowering you to complete the task with confidence.
Before you even pick up a wrench, it’s crucial to gain a foundational understanding of the system you’ve chosen. The world of under-sink water filters is diverse, and each system operates on slightly different principles. Your filter is not a monolithic entity; it’s a carefully engineered assembly designed to tackle specific waterborne contaminants. Familiarizing yourself with its components and their functions is akin to a mechanic understanding the engine before starting repairs.
Types of Under Sink Water Filters
The primary distinction among under-sink filters lies in their filtration technology. Each type targets a different range of impurities, ensuring you can select a system tailored to your water’s unique profile.
Activated Carbon Filters
These are perhaps the most common type of filter. Activated carbon, a porous material, acts like a sponge, adsorbing a wide array of contaminants from water. Think of it as a meticulously designed sieve, with pores so small they can trap molecules of chlorine, volatile organic compounds (VOCs), pesticides, and herbicides. The larger the surface area of the carbon, the more effective it is at adsorption. Different forms of activated carbon exist, including granular activated carbon (GAC) and solid carbon block filters, each offering slightly varying levels of filtration efficiency and longevity.
Reverse Osmosis (RO) Systems
RO systems are the heavy artillery of water filtration. They employ a semi-permeable membrane that allows water molecules to pass through while blocking almost all dissolved solids, including salts, heavy metals (like lead and arsenic), and even bacteria and viruses. This process is powered by water pressure. While exceptionally effective at producing highly purified water, RO systems typically generate wastewater and may require a storage tank due to their slower filtration rate. They are like a hyper-selective gatekeeper, allowing only the most desirable visitors into your water supply.
Sediment Filters
These filters are typically the first line of defense in a multi-stage system. Their primary function is to remove larger particulate matter such as sand, silt, rust, and other sediment. They prevent these larger particles from clogging subsequent filtration stages, thus extending their lifespan. Imagine them as the initial security checkpoints, stopping the obvious troublemakers before they can disrupt the more sensitive operations further down the line.
Other Filtration Technologies
Beyond these common types, you might encounter systems incorporating other technologies:
- Ceramic Filters: These filters use a porous ceramic material to physically strain out bacteria, cysts, and sediment. They are often washable and reusable, offering a durable filtration solution.
- UV Sterilizers: While not strictly filters, UV systems use ultraviolet light to neutralize bacteria, viruses, and other microorganisms without adding chemicals. They are often used as a final stage in conjunction with other filters.
- Ion Exchange Resins: These specialized resins are used to remove specific dissolved ions, such as calcium and magnesium (which cause hard water) or heavy metals.
Identifying Your System’s Components
As you unpack your new water filter, you’ll likely find a collection of parts. Each plays a vital role in the filtration process. Understanding what each piece is and where it fits is paramount to a successful installation.
- Filter Housing/Cartridge: This is the primary container for your filtration media. It protects the filter material and connects to your plumbing.
- Filter Cartridges: These are the replaceable elements that contain the filtration media (activated carbon, sediment material, RO membrane, etc.).
- Tubing: You’ll receive flexible plastic tubing to connect the filter system to your existing water supply and faucet.
- Fittings and Connectors: These are the various nuts, bolts, and adapters that ensure secure and leak-proof connections between the tubing, filter housing, and your plumbing.
- Mounting Bracket (Optional): Some systems come with a bracket to secure the filter housing(s) to the inside of your cabinet.
- Dedicated Faucet (Optional): Some advanced systems, particularly RO systems, come with a separate, specialized faucet for filtered water. This prevents contamination of your main faucet’s water supply with filtered water and simplifies dispensing.
- Shut-off Valve: A critical component, this valve allows you to isolate the filter system from your main water supply for maintenance or replacement.
If you’re looking for a comprehensive guide on how to install an under sink water filter, you may find this related article helpful: How to Install an Under Sink Water Filter. This resource provides step-by-step instructions, along with tips and tricks to ensure a smooth installation process, making it easier for you to enjoy clean and filtered water right from your kitchen sink.
Preparing Your Workspace and Gathering Tools
A well-prepared workspace is the foundation of any successful DIY project. Before you begin the actual physical installation, dedicate time to setting up your environment and ensuring you have all the necessary tools. Think of this as a surgeon preparing their operating room; meticulous organization allows for precision and efficiency.
Clearing the Under-Sink Cabinet
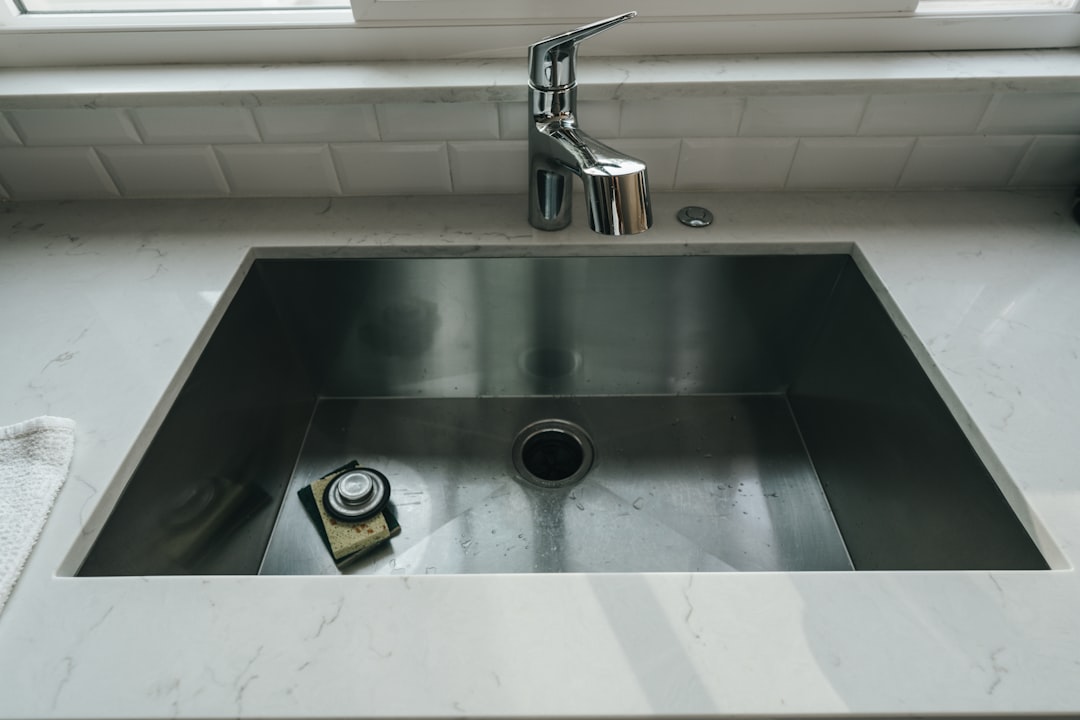
Your under-sink cabinet will soon become a hub of activity. Clear out everything that resides there. This includes cleaning supplies, trash cans, and any other items that might hinder your work or become contaminated. A clutter-free space is not only safer but also allows you greater maneuverability. This space is about to transform into a mini water treatment facility; give it the respect it deserves.
Essential Tools for Installation
While the specific tools required might vary slightly depending on your filter model, here’s a comprehensive list of what you’ll likely need:
- Adjustable Wrench/Pipe Wrench: For tightening and loosening plumbing fittings.
- Screwdriver Set: Both Phillips and flathead screwdrivers will likely be necessary for mounting brackets or securing components.
- Drill with Drill Bits: You may need to drill holes for mounting brackets or for the installation of a new faucet. Ensure you have bits appropriate for both wood and potentially metal.
- Bucket: To catch any residual water when you disconnect your existing plumbing.
- Towels/Rags: For cleaning up spills and drying components.
- Plumber’s Tape (Teflon Tape): Essential for creating watertight seals on threaded pipe connections.
- Safety Glasses: To protect your eyes from debris and potential water splashes.
- Utility Knife or Tubing Cutter: For cleanly cutting the plastic tubing to the desired length. A clean cut is crucial for ensuring a leak-free connection.
- Measuring Tape: For accurately measuring the required length of tubing.
- Headlamp or Flashlight: To illuminate the often dimly lit under-sink environment.
Checking Your Water Supply Line
Before you disconnect anything, take a moment to examine your existing water supply lines. Are they copper, PEX, or flexible braided hoses? This knowledge will inform the type of fittings and connectors you’ll need. Your existing plumbing is the gateway to your new filtration system; understand its architecture.
Tapping into the Water Supply
This is arguably the most critical stage of the installation. You need to introduce your new filter system into your existing plumbing without causing leaks or disrupting your household’s water flow. Precision and adherence to best practices are paramount here, much like accurately splicing into a main electrical line.
Locating the Cold Water Supply Line
Under most sinks, you’ll find two water supply lines: one for hot water and one for cold water. Under-sink water filters are typically connected to the cold water line only. Locate the flexible hose or pipe that delivers cold water to your faucet. This is your entry point.
Shutting Off the Main Water Supply
For safety and to prevent a torrent of water from flooding your cabinet, you must shut off the main water supply to your house before proceeding. This valve is usually located in your basement, crawl space, or near your water meter. Once shut off, open your kitchen faucet and a downstairs faucet to drain any residual water from the pipes.
Installing the Feed Water Adapter (T-Valve)
Most under-sink filter systems utilize a feed water adapter, often referred to as a T-valve or a saddle valve, to tap into the cold water supply line.
- Types of Feed Water Adapters:
- T-Valve: This is the most common and recommended method. It involves cutting into the cold water line and installing a T-shaped fitting that allows water to flow to both your faucet and your filter system.
- Saddle Valve: These are less common now due to potential for leaks. They clamp onto the pipe and pierce it to create an outlet. If your system includes one, ensure it’s installed according to the manufacturer’s instructions.
- Installation Process (T-Valve Example):
- Position the T-Valve: Identify a suitable location on the cold water supply line, preferably a straight section.
- Disconnect Existing Line: Carefully disconnect the cold water supply line from your faucet or the wall valve. Have your bucket ready to catch any trapped water.
- Install the T-Valve: Follow the specific instructions for your T-valve. This usually involves attaching components to the existing pipe and then reattaching your cold water supply line to one of the T-valve’s outlets.
- Apply Plumber’s Tape: For all threaded connections, wrap plumber’s tape (Teflon tape) clockwise around the threads. This creates a watertight seal.
- Tighten Securely: Tighten all connections with your wrench but avoid overtightening, which can damage threads or fittings.
Connecting the Filter Tubing to the Feed Water Adapter
Once the feed water adapter is securely installed, you’ll connect one end of the supplied tubing to it. Most systems use quick-connect fittings. Simply push the tubing firmly into the fitting until it seats. Ensure the tubing is cut cleanly and not kinked.
Installing the Filter Housings and Cartridges
With the water supply tapped, you can now focus on the heart of the system: the filter housings and their precious cargo. This is where the magic of purification begins.
Mounting the Filter Housing(s)
Many under-sink filters consist of one or more cylindrical housings that contain the filter cartridges. These housings need to be securely mounted to prevent movement and potential damage.
- Using the Mounting Bracket: If your system includes a mounting bracket, position it inside your cabinet in a location that provides easy access to filters for future replacement. You may need to drill pilot holes and then secure the bracket with screws.
- Considerations for Placement: Ensure the housings are oriented so that the water inlet and outlet ports are accessible and that there is enough clearance to unscrew the housings for cartridge changes. Think of it as giving your filter system room to breathe and perform its duties.
Inserting the Filter Cartridges
Each filter housing will contain one or more filter cartridges. The order in which these cartridges are installed is crucial to the effectiveness of your filtration system.
- Consult Your Manual: Always refer to your filter system’s manual for the correct order of cartridge installation. Incorrect placement can lead to reduced purification effectiveness or even damage to the system. Think of it as following a recipe; the order of ingredients matters.
- Lubricate O-rings: Before inserting any cartridge that has an O-ring seal, lightly lubricate the O-ring with food-grade silicone grease. This helps create a proper seal and prevents the O-ring from being damaged during installation.
- Proper Seating: Gently but firmly insert each cartridge into its housing, ensuring it is seated correctly. You should feel it click into place or sit flush.
Connecting the Tubing to the Filter Housings
Now you’ll connect the tubing from the feed water adapter to the inlet of your first filter housing, and then from the outlet of that housing to the inlet of the next (if you have a multi-stage system), and so on. Finally, connect the outlet of the last filter housing to your dedicated filtered water faucet or the cold water line leading to your faucet.
- Quick-Connect Fittings: If your system uses quick-connect fittings, ensure the tubing is cut squarely and pushed firmly into the fitting until it is fully seated. To release the tubing, you typically need to press on a collar around the fitting.
- Threaded Fittings: If using threaded fittings, apply plumber’s tape to the threads and tighten them snugly with an adjustable wrench.
If you’re considering improving your home’s water quality, installing an under sink water filter can be a great choice. For a comprehensive guide on the installation process, you might find this related article helpful. It offers step-by-step instructions and tips to ensure you get the best results. You can check it out here: how to install under sink water filter. This resource will provide you with all the information you need to make the installation smooth and effective.
Installing the Filtered Water Faucet
| Step | Task | Tools/Materials Needed | Estimated Time | Notes |
|---|---|---|---|---|
| 1 | Turn off water supply | Shutoff valve | 5 minutes | Locate the cold water valve under the sink and turn it off |
| 2 | Relieve water pressure | Sink faucet | 2 minutes | Open faucet to drain remaining water |
| 3 | Mount filter bracket | Drill, screws, screwdriver | 10 minutes | Choose a convenient location inside the cabinet |
| 4 | Connect water supply line | Adjustable wrench, tubing | 10 minutes | Attach tubing from cold water valve to filter inlet |
| 5 | Connect faucet line | Tubing, wrench | 10 minutes | Connect tubing from filter outlet to dedicated faucet or existing faucet adapter |
| 6 | Install filter cartridge | Filter cartridge | 5 minutes | Follow manufacturer instructions for cartridge installation |
| 7 | Turn on water supply and check for leaks | None | 5 minutes | Inspect all connections carefully |
| 8 | Flush filter | Sink faucet | 5 minutes | Run water through filter to remove air and impurities |
If your system includes a dedicated faucet for filtered water, this step requires a bit more hands-on work, typically involving drilling a hole in your countertop or sink. If your system bypasses this and utilizes your existing faucet, you can skip this section. Taking this step is akin to adding a specialized spout to your existing water infrastructure.
Choosing the Faucet Location
Decide where you want your filtered water faucet to be. Common locations include:
- Next to your existing faucet.
- On the edge of your sink basin.
- On the countertop near the sink.
Consider accessibility for dispensing water and proximity to the existing plumbing where you’ll be tapping into the water supply.
Drilling the Faucet Hole
This is a step that requires care and precision.
- Marking the Spot: Use a marker to precisely mark the center of where you want to drill the hole.
- Drilling: For stainless steel sinks, use a step drill bit or a hole saw specifically designed for metal. For countertops (granite, solid surface), use a carbide-tipped masonry bit or a diamond hole saw appropriate for the material. Always wear safety glasses during drilling. Start with a small pilot hole and gradually increase the size until you reach the required diameter for your faucet’s shank.
- Clean Up: Once the hole is drilled, ensure the edges are smooth and free of debris.
Mounting the Faucet
Follow the manufacturer’s instructions for mounting the faucet. This typically involves inserting the faucet shank through the drilled hole and securing it from underneath with a washer and mounting nut. Ensure the faucet is positioned correctly and tightened securely.
Connecting the Tubing to the Faucet
Connect the outlet tubing from your final filter housing to the inlet port on your new filtered water faucet. Again, this is usually a quick-connect fitting.
Testing for Leaks and Final Checks
The moment of truth has arrived. After all the connections are made, it’s time to bring the system online and ensure everything is watertight. This stage is akin to a final systems check before a spacecraft launches; every detail matters.
Turning the Water Supply Back On
Slowly and cautiously turn the main water supply valve back on. Listen for any unusual noises and watch for immediate leaks.
Initial Flush of the System
Most filter systems require an initial flushing period to remove any manufacturing residue or fine carbon particles from the cartridges.
- Follow Manufacturer Instructions: Your manual will specify the duration and method for flushing. This usually involves running water through the system for a set period of time (e.g., 5-10 minutes) and discarding the flushed water.
- Check All Connections: While the system is flushing, meticulously inspect every connection point for any signs of dripping or weeping. Pay close attention to the feed water adapter, filter housing seals, and faucet connections.
Tightening Loose Fittings (If Necessary)
If you discover any minor leaks, do not panic. Carefully tighten the affected fitting slightly. For quick-connect fittings, ensure the tubing is fully seated. In some cases, slightly loosening and then re-tightening a fitting with fresh plumber’s tape can resolve persistent leaks.
Ensuring Proper Water Flow
Once you’re confident there are no leaks, check the water flow from your filtered water faucet. It should be a steady stream. If the flow is significantly reduced or nonexistent, retrace your steps and ensure no kinks in the tubing are obstructing the flow and that the cartridges are installed correctly.
Ongoing Maintenance
Your under-sink water filter is not a set-it-and-forget-it appliance. Regular maintenance is key to its longevity and continued effectiveness.
- Filter Cartridge Replacement: Be diligent about replacing your filter cartridges according to the manufacturer’s recommended schedule (or when you notice a decline in water quality or flow). This is the most critical aspect of ongoing maintenance, akin to changing the oil in your car.
- Periodic Inspection: Periodically, give your system a visual inspection for any signs of wear, damage, or leaks. This proactive approach can prevent larger problems down the line.
By following these comprehensive steps, you will successfully install your under-sink water filter, providing your household with a consistent supply of clean, purified water. This investment in your home’s water quality is a direct investment in your family’s well-being.
FAQs
What tools do I need to install an under sink water filter?
To install an under sink water filter, you typically need a wrench, screwdriver, drill (if mounting is required), plumber’s tape, and sometimes a tubing cutter. The exact tools may vary depending on the filter model.
How long does it take to install an under sink water filter?
Installation usually takes between 30 minutes to 1 hour for most standard under sink water filters, assuming basic plumbing knowledge and no complications.
Do I need to turn off the water supply before installation?
Yes, it is essential to turn off the cold water supply under the sink before beginning the installation to prevent leaks and water damage.
Can I install an under sink water filter myself, or should I hire a professional?
Many under sink water filters are designed for DIY installation and come with detailed instructions. However, if you are uncomfortable with plumbing tasks or encounter complex plumbing, hiring a professional plumber is recommended.
How often should I replace the filter cartridge in an under sink water filter?
Filter replacement frequency varies by model and water usage but generally ranges from every 3 to 12 months. Always follow the manufacturer’s guidelines for optimal performance.