
DIY Electronics Repair: A Beginner’s Guide
Embarking on the journey of do-it-yourself (DIY) electronics repair can seem daunting, akin to navigating a labyrinth without a map. However, for those with a curious mind and a desire to understand the inner workings of their devices, it offers a rewarding pathway to problem-solving and resourcefulness. This guide serves as a foundational stepping stone, equipping beginners with the essential knowledge and a structured approach to confidently tackle common electronic repairs.
Before one can effectively diagnose and mend, a fundamental grasp of electronic principles is crucial. This section lays the groundwork, explaining the building blocks of electronic circuits and the common culprits behind device failures.
The Flow of Electricity: Voltage, Current, and Resistance
Electricity, the lifeblood of modern electronics, can be understood through three primary concepts: voltage, current, and resistance. Voltage represents the electrical potential difference, analogous to the pressure in a water pipe, driving the flow of charge. It is measured in volts (V). Current, on the other hand, is the rate of flow of electrical charge, much like the volume of water flowing through the pipe, measured in amperes (A). Resistance is the opposition to this flow, akin to a constriction in the pipe, measured in ohms ($\Omega$). The relationship between these three is elegantly described by Ohm’s Law: V = I * R, where V is voltage, I is current, and R is resistance. Understanding this interplay is fundamental to comprehending how circuits function and how faults can arise.
Essential Electronic Components
Electronic devices are constructed from a variety of components, each with a specific role. Key among these are:
Resistors: The Pace Setters
Resistors are passive components that impede the flow of current. They come in various forms and values, indicated by color bands or numerical markings, and are essential for controlling voltage and current levels within a circuit. A faulty resistor can cause a circuit to malfunction by altering these precise levels.
Capacitors: The Energy Reservoirs
Capacitors store electrical energy in an electric field, acting like tiny rechargeable batteries within a circuit. They are used for filtering, smoothing voltage fluctuations, and timing. Identifying a blown or leaky capacitor, often indicated by physical bulges or discoloration, is a common diagnostic step.
Diodes: The One-Way Gates
Diodes allow current to flow in only one direction, acting as electrical one-way valves. They are integral to power supplies, rectifiers, and signal processing. A failed diode can prevent current from flowing or allow it to flow in the wrong direction, disrupting circuit operation.
Transistors: The Electronic Switches and Amplifiers
Transistors are semiconductor devices that can amplify or switch electronic signals and electrical power. They are the workhorses of modern electronics, forming the basis of integrated circuits. A malfunctioning transistor can lead to a complete cessation of function or erratic behavior.
Integrated Circuits (ICs): The Brains of the Operation
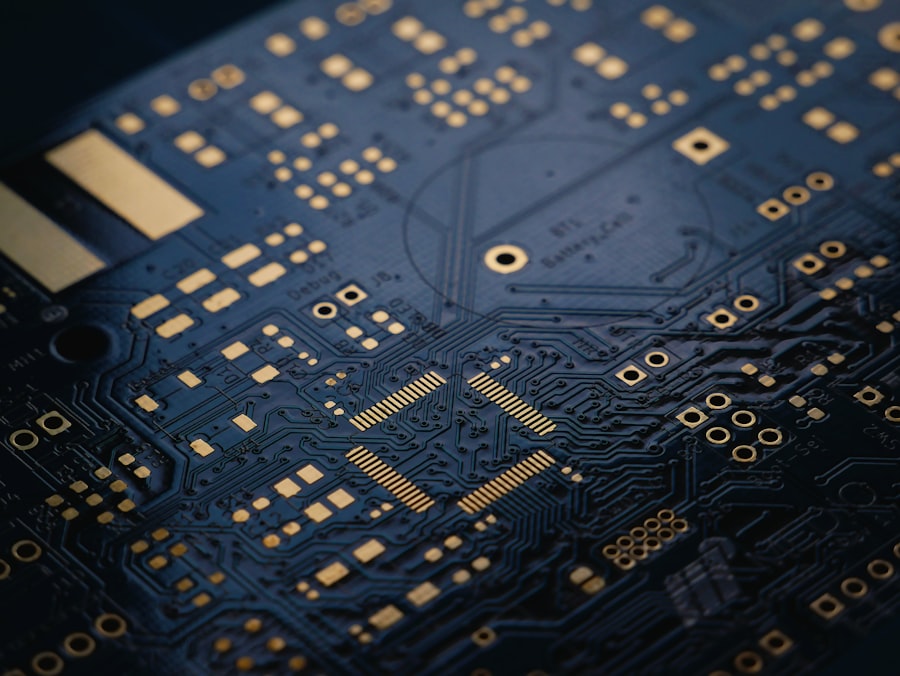
Integrated circuits, often referred to as chips, contain a vast number of transistors and other components miniaturized onto a single piece of semiconductor material. They perform complex functions, from processing data to controlling power. While repairing individual components within an IC is rarely feasible for a beginner, identifying a faulty IC is a common outcome of a diagnostic process.
Common Causes of Electronic Failure
Electronic devices typically fail due to a combination of factors. Recognizing these common failure points can significantly expedite the diagnostic process.
Wear and Tear: The Inevitable Aging Process
Like any mechanical system, electronic components are subject to aging. Over time, materials degrade, solder joints can weaken, and connections can corrode, leading to intermittent or complete failure. This is particularly prevalent in devices that experience frequent use or are exposed to harsh environments.
Power Surges and Fluctuations: The Electrical Storms
Sudden spikes or drops in voltage, often caused by lightning strikes, power grid issues, or faulty power supplies, can overwhelm and destroy sensitive electronic components. Surge protectors act as a shield against these electrical storms, but they are not infallible.
Physical Damage: The Accidental Blows
Drops, impacts, and spills are unfortunately common occurrences for electronic devices. This physical trauma can lead to cracked circuit boards, broken solder joints, damaged connectors, and internal component failure.
Overheating: The Silent Killer
Excessive heat can significantly shorten the lifespan of electronic components. Poor ventilation, dust buildup, or overloaded circuits can lead to components degrading or failing prematurely. This can manifest as sluggish performance or complete shutdown.
Manufacturing Defects: The Unforeseen Flaws
While rare, components or entire devices can suffer from defects introduced during the manufacturing process. These can manifest at any point, from immediately after purchase to years of service.
If you’re interested in learning how to fix your own electronics, a great resource to check out is an article that provides step-by-step guidance tailored for beginners. This article covers essential tools, common repairs, and troubleshooting tips that can help you gain confidence in handling various electronic devices. To explore this valuable information, visit this link for more insights and practical advice on DIY electronics repair.
Essential Tools for DIY Electronics Repair
A well-equipped toolbox is the foundation of any successful DIY endeavor, and electronics repair is no exception. Investing in the right tools will not only make the repair process more efficient but also safer.
The Absolute Essentials: Your First Line of Defense
For beginners, a few key tools will suffice to undertake many common repairs. These are the bedrock upon which more specialized tools can be built.
Precision Screwdriver Set: The Delicate Manipulators
Modern electronics often utilize tiny screws, requiring specialized precision screwdrivers. A set with a variety of Phillips, flathead, and Torx bits is indispensable for disassembling devices without stripping screws or damaging ports.
Pliers and Tweezers: For Grasping and Positioning
Needle-nose pliers are invaluable for gripping small components, bending wires, and manipulating delicate parts within a confined space. ESD-safe (Electrostatic Discharge) tweezers are crucial for handling sensitive components without accidentally discharging static electricity, which can damage them.
Multimeter: The Electrical Detective
A multimeter is arguably the most critical tool for any electronics repair. It allows you to measure voltage, current, and resistance, providing vital diagnostic information about a circuit. Learning to use a multimeter effectively is paramount.
Soldering Iron and Solder: The Art of Connection
For replacing faulty components, a variable-temperature soldering iron is essential. The ability to safely and effectively solder and desolder components is a core skill. Lead-free solder is now the standard for environmental reasons.
Desoldering Braid and Pump: Undoing Mistakes and Removing Components
Mistakes happen, and components need to be removed. Desoldering braid (solder wick) absorbs molten solder, while a desoldering pump vacuums away excess solder, facilitating clean removal of components.
Safety First: Protecting Yourself and Your Devices
Working with electricity carries inherent risks. Prioritizing safety is not merely a recommendation; it is a necessity.
ESD Protection: Guarding Against the Invisible Threat
Electrostatic Discharge (ESD) can silently destroy sensitive electronic components. An ESD-safe wrist strap, connected to a common ground point, is crucial for dissipating static electricity from your body. Working on an ESD mat further enhances protection.
Ventilation: Clearing the Fumes
Soldering produces fumes, which can be harmful if inhaled. A well-ventilated workspace or a fume extractor is necessary to ensure a safe working environment.
Eye Protection: Shielding Your Vision
Flying debris or accidental splashes of solder can pose a risk to your eyes. Safety glasses are a simple yet effective measure to protect your vision.
Workspace Setup: Creating Your Repair Haven
A dedicated and organized workspace can significantly improve efficiency and reduce frustration.
Lighting: Illuminating the Details
Good lighting is essential for accurately seeing small components and intricate solder joints. A desk lamp with adjustable brightness and positioning is highly recommended.
Organization: Taming the Chaos
Keeping your tools and components organized is key to a smooth workflow. Small bins, trays, and magnetic mats can help prevent loss and misplacement of tiny parts.
The Diagnostic Process: Unraveling the Mystery
Before any ferramentas are even picked up, a systematic diagnostic approach is necessary to pinpoint the source of the problem. This methodical process is like a detective meticulously gathering clues.
Step 1: Gather Information and Observe
The initial phase involves understanding the problem from the user’s perspective and making thorough observations.
Understanding the Symptoms: What is the Device Doing (or Not Doing)?
Start by clearly defining the problem. Is the device completely dead? Does it exhibit intermittent behavior? Are there strange noises or smells? Documenting these symptoms precisely is the first piece of the puzzle.
Visual Inspection: The First Look for Obvious Flaws
Carefully examine the device for any visible signs of damage. Look for burnt components, bulging capacitors, cracked circuit boards, loose connections, or signs of liquid damage. This initial visual sweep can often reveal the culprit.
Step 2: Research and Documentation
Leveraging available resources can provide invaluable insights into common issues and repair procedures.
Online Resources: The Digital Library of Knowledge
The internet is a treasure trove of information. Search for your specific device model along with the symptoms you are experiencing. Websites like iFixit.com, YouTube, and various electronics forums are excellent starting points for troubleshooting guides and repair videos.
User Manuals and Schematics: The Manufacturer’s Blueprint
If available, consult the device’s user manual for troubleshooting sections. For more advanced repairs, searching for circuit diagrams (schematics) can be incredibly helpful, though these can be harder to find for consumer electronics.
Step 3: Testing and Measurement
This is where your multimeter becomes your most valuable ally.
Power Supply Testing: Is the Juice Flowing Correctly?
Begin by testing the power source. If the device has an external power adapter, check its output voltage with your multimeter. Ensure it matches the device’s requirements. For devices powered by batteries, check their charge level.
Continuity Testing: Tracing the Electrical Pathways
Continuity testing verifies that electrical pathways are unbroken. Use your multimeter to check for continuity across traces, wires, and component leads. An open circuit indicates a break in the path.
Component Testing: Isolating the Faulty Part
Once a suspected component is identified, it can be tested individually. This might involve measuring resistance across a resistor, checking for shorts or opens in a diode, or testing for leakage in a capacitor (though specialized testers are better for capacitors). Be sure to isolate the component from the circuit for accurate readings, if possible.
Common Repair Scenarios and Solutions
This section delves into typical issues encountered by beginners and provides practical, step-by-step approaches to their resolution.
No Power: The Device is “Dead”
This is a common and often frustrating problem. The approach is to systematically eliminate potential causes.
Checking the Power Source
As mentioned in diagnostics, the power source is the first suspect. Ensure the power outlet is working (test with another device), check the power cable for damage, and verify the voltage of the power adapter with a multimeter.
Investigating the Power Switch
The power switch itself can fail. With the device unplugged, use your multimeter to check for continuity across the switch when it is in the “on” position. If there’s no continuity, the switch likely needs replacement.
Examining Internal Fuses
Many electronic devices contain small fuses designed to protect the circuitry from overcurrent. These are often small glass or ceramic cylinders with a wire inside. If a fuse is blown, the wire will be broken. Visually inspect fuses, or test for continuity with a multimeter. Replacing a blown fuse with one of the exact same rating is crucial; using an underrated fuse can lead to further damage.
Looking at the Power Supply Circuitry
Within the device, the power supply circuit takes the input voltage and converts it into the various voltages required by the internal components. This circuit often contains transformers, rectifiers (diodes), filters (capacitors), and voltage regulators. Faults in these components can prevent proper power distribution. Identifying and testing these components, particularly capacitors for bulging or leakage, is a common step.
Intermittent Problems: The Elusive Gremlins
Intermittent issues, where a device works sometimes and not others, can be particularly challenging. These often point to loose connections or developing faults.
Loose Connections: The Unseen Obstacles
Over time, solder joints can crack, wires can become loose, or connectors can develop oxidation. Gently probing connections while the device is operational (and safe to do so) can sometimes reveal the point of failure. Re-soldering suspect connections is often a solution.
Overheating Components: The Heat-Related Glitches
If a device starts malfunctioning after being on for a while, overheating is a likely culprit. Check for dust buildup in vents and fans. Ensure fans are spinning correctly. Consider replacing thermal paste on processors if applicable.
Failing Capacitors: The Leaky Vessels
Capacitors, especially electrolytic ones, can degrade over time. As they age, their capacitance can decrease, and they can develop internal leakage. This can lead to unstable voltage levels and erratic behavior. Visually inspecting capacitors for bulges or leaks is a good starting point.
Specific Component Failures: Targeting the Culprit
Once a specific component is suspected, a targeted approach is required.
Replacing a Resistor: Maintaining the Flow
If a resistor is found to be out of tolerance or open, it needs replacement. Note the resistor’s value (from color bands or markings) and wattage. Desolder the old resistor and carefully solder in a new one of the exact same specifications.
Replacing a Capacitor: Restoring the Balance
Faulty capacitors, especially those that have visibly failed, are common replacements. Note the capacitance value (in Farads, $\mu$F, or nF) and the voltage rating. For polarized electrolytic capacitors, ensure the replacement is installed with the correct polarity; reversing it can cause it to explode.
Replacing a Diode or Transistor: Ensuring One-Way Flow or Amplification
Replacing diodes and transistors requires careful desoldering to avoid damaging the circuit board. Note the part number of the faulty component and replace it with an identical or functionally equivalent part. Pay attention to the component’s orientation (e.g., the flat edge on some diodes or the gate pin on MOSFETs).
If you’re interested in learning how to fix your own electronics, a great starting point is to explore beginner-friendly resources that can guide you through the process. One such article provides valuable tips and tricks for troubleshooting common issues, making it easier for novices to gain confidence in their skills. You can check out this helpful guide on fixing electronics by following this link. With the right information at your fingertips, you’ll be well on your way to becoming proficient in electronics repair.
Advanced Techniques and Considerations for Future Growth
| Step | Task | Tools Needed | Estimated Time | Difficulty Level | Tips |
|---|---|---|---|---|---|
| 1 | Diagnose the Problem | Multimeter, Screwdrivers | 15-30 minutes | Easy | Check for obvious signs like broken wires or burnt components |
| 2 | Gather Replacement Parts | Online parts catalog, local electronics store | 1-2 hours | Easy | Use exact model numbers to find compatible parts |
| 3 | Disassemble the Device | Screwdrivers, Plastic Pry Tools | 20-40 minutes | Medium | Keep screws organized and take photos for reassembly |
| 4 | Replace or Repair Faulty Components | Soldering Iron, Multimeter | 30-60 minutes | Medium | Practice soldering on scrap boards before working on your device |
| 5 | Reassemble and Test | Screwdrivers | 15-30 minutes | Easy | Test the device before fully tightening screws |
| 6 | Safety Precautions | Anti-static wrist strap, Safety glasses | Ongoing | Easy | Always unplug devices and discharge capacitors before working |
As your confidence and experience grow, you will naturally gravitate towards more complex repairs and a deeper understanding of electronics. This section offers a glimpse into what lies ahead.
Understanding Circuit Diagrams (Schematics)
Circuit diagrams are the blueprints of electronic devices. Learning to read and interpret them will unlock the ability to understand complex circuits and troubleshoot more challenging issues. This involves recognizing standard symbols for components and understanding how they are interconnected.
Surface Mount Technology (SMT) Repair
Modern electronics predominantly use Surface Mount Technology, where components are soldered directly onto the surface of the circuit board, rather than through holes. Repairing SMT components often requires specialized tools like fine-tipped soldering irons, hot air rework stations, and magnification.
Troubleshooting Integrated Circuits
While direct repair of individual transistors within an IC is generally not feasible for a hobbyist, understanding how ICs function within a circuit can aid in diagnosing when an IC itself has failed. This often involves checking input and output voltages to the IC and comparing them to expected values.
Learning Advanced Diagnostic Tools
As you progress, you might consider investing in more advanced diagnostic tools such as oscilloscopes (to visualize signal waveforms), logic analyzers (to examine digital signals), and component testers.
The Importance of Continuous Learning
The field of electronics is constantly evolving. Embracing continuous learning through online courses, books, and hands-on practice is essential for staying current and expanding your repair capabilities. The journey of DIY electronics repair is not a destination but an ongoing process of discovery and mastery. By approaching it with patience, meticulousness, and a thirst for knowledge, you can transform yourself from a novice into a capable electronics troubleshooter.
FAQs
What basic tools do I need to start fixing my own electronics?
To begin repairing electronics, you typically need a set of precision screwdrivers, a multimeter, tweezers, a soldering iron, anti-static wrist strap, and a magnifying glass. These tools help you safely open devices, test components, and make necessary repairs.
Is it safe to repair electronics at home as a beginner?
Yes, it can be safe if you follow proper precautions such as unplugging devices before working on them, using anti-static equipment, working in a well-lit area, and avoiding high-voltage components unless you have proper training.
How can I identify the problem in a broken electronic device?
Start by visually inspecting the device for obvious damage like burnt components or loose connections. Use a multimeter to test electrical continuity and voltage levels. Research common issues for your specific device model to guide your troubleshooting.
Where can beginners find reliable repair guides and tutorials?
Beginners can find helpful repair guides on websites like iFixit, YouTube channels dedicated to electronics repair, manufacturer service manuals, and online forums where experienced technicians share advice.
When should I consider professional repair instead of fixing it myself?
If the device involves complex components like high-voltage circuits, microchips, or if you lack the necessary tools and experience, it’s safer to seek professional repair. Also, if the cost of repair exceeds the value of the device, professional advice is recommended.