Repairing a Cracked Phone Screen: A DIY Guide
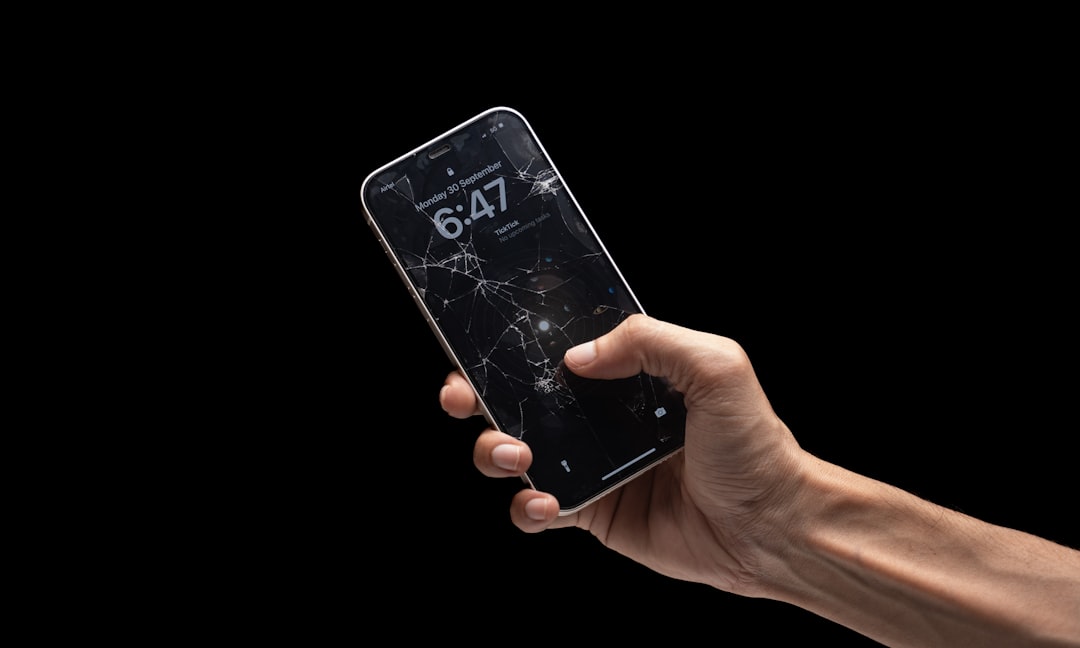
A cracked phone screen is a common affliction, a spiderweb of damage marring the smooth surface that serves as a portal to our digital lives. While the initial shock of seeing a fractured display can be disheartening, it is often a repairable problem. This guide will provide a comprehensive, step-by-step approach to replacing a cracked phone screen for those with a willingness to engage in a hands-on repair. It is essential to understand that this process requires patience, precision, and a methodical approach. Attempting this repair without proper preparation or understanding can lead to further damage to the device.
Before embarking on the repair, it is crucial to thoroughly assess the extent of the screen damage. A seemingly minor crack might conceal deeper issues, such as compromised touchscreen functionality or internal component damage.
Types of Screen Damage
- Cosmetic Cracks: These are superficial fractures that primarily affect the aesthetics of the display. While they can be unsightly, they often do not impede the functionality of the touchscreen or the underlying display.
- Functional Cracks: These cracks extend deeper, potentially interfering with the capacitive touch sensors. This can manifest as unresponsive areas on the screen, ghost touches (the screen registering touches that were not made), or a complete loss of touch functionality.
- Display Damage: Beyond the glass, the underlying display panel (LCD or OLED) can also be damaged. This might result in dead pixels, distorted colors, lines running across the screen, or a completely black display.
Potential Complications of a Cracked Screen
- Further Fracturing: Even minor cracks can become more significant over time due to pressure, temperature fluctuations, or further impacts. This can lead to a cascading failure of the screen.
- Water and Dust Ingress: A compromised screen creates an entry point for moisture and debris. Even small amounts of liquid can cause significant damage to the internal electronics, leading to corrosion or short circuits. Dust particles can accumulate and interfere with components.
- Electrical Hazard: While rare with typical phone screen breaks, in very severe cases where internal wiring is exposed, there might be a very low risk of electrical discharge if the device is powered on and handled improperly. However, the primary concern remains functional impairment and ingress of contaminants.
- Compromised User Experience: A cracked screen can be a constant distraction and an impediment to everyday use. Navigation can become difficult, and the visual distortion can strain the eyes.
If you’re looking to repair a cracked phone screen yourself, you might find it helpful to read a related article that offers step-by-step guidance and tips for a successful DIY repair. This comprehensive guide covers everything from the tools you’ll need to the techniques for safely removing the damaged screen. For more information, check out this helpful resource: How to Repair a Cracked Phone Screen Yourself.
Gathering the Necessary Tools and Replacement Parts
The success of any DIY repair hinges on having the right equipment and components. Attempting to use makeshift tools can be likened to trying to build a house with a butter knife; it is inefficient and likely to result in a suboptimal outcome.
Essential Tools for Screen Replacement
- Precision Screwdriver Set: These small, specialized screwdrivers are designed to fit the minuscule screws found in electronic devices. A set typically includes Phillips, Torx, and pentalobe bits.
- Plastic Opening Tools (Spudgers and Picks): These tools are crucial for prying open the phone casing without scratching or damaging the delicate plastic or metal components. Metal tools should be avoided for this purpose.
- Suction Cup: A small suction cup is used to lift the screen away from the frame, especially for devices where the screen is the primary point of access.
- Heat Gun or Hair Dryer: Gentle heat is often required to soften adhesive that holds the screen or battery in place. Excessive heat can damage internal components.
- Tweezers: Fine-tipped tweezers are invaluable for handling tiny screws, cables, and connectors.
- Anti-static Wrist Strap: Static electricity, an invisible but potent foe of electronics, can permanently damage sensitive components. An anti-static wrist strap grounds your body, preventing harmful discharges.
- Safety Glasses: Protect your eyes from flying fragments of glass and other debris during the disassembly process.
- Small Container or Tray: To meticulously organize the screws and other small parts extracted from the phone. Labeling these containers can be immensely helpful.
- Isopropyl Alcohol (90% or higher): Used for cleaning away old adhesive residue.
- Duct Tape or Packing Tape (Optional): Can be used to secure severely shattered glass to prevent further fragmentation during disassembly.
Sourcing the Replacement Screen
- Identify Your Device Model Precisely: This is paramount. Even minor variations in model numbers can mean incompatible parts. Check the device’s settings, original packaging, or the back of the phone for the exact model number.
- Reputable Online Retailers: Many online marketplaces and specialized electronics repair part suppliers offer replacement screens. Look for vendors with good reviews and clear return policies.
- Screen Quality Variations: Replacement screens can vary in quality. Some may be OEM (Original Equipment Manufacturer) parts, while others are aftermarket. Aftermarket screens can be less expensive but may have differences in color accuracy, brightness, or touch sensitivity. Research the reputation of the manufacturer of the replacement screen.
- Screen Assembly vs. Digitizer:
- Display Assembly: This typically includes the glass, digitizer (which registers touch), and the LCD or OLED display panel as a single, pre-assembled unit. This is usually the easiest for DIY replacement.
- Digitizer Only: If only the touchscreen is damaged (and the display itself is fine), you can sometimes replace just the digitizer. However, this is often a more complex and delicate repair as the digitizer is fused to the display panel and often requires separation.
- Check for Included Components: Some replacement screens come with a pre-attached frame, adhesive strips, or even small tools. Ensure the product description clearly lists what is included.
The Disassembly Process: A Step-by-Step Approach
Disassembly is a precise surgical procedure. Proceed with caution, treating each component with respect. Rushing through this stage is akin to a surgeon being hasty with their scalpel – the consequences can be severe.
Initial Preparations
- Power Down the Device: Ensure the phone is completely powered off. Do not attempt repairs on a powered-on device.
- Remove SIM Card and SD Card: These are typically easily accessible and should be removed to prevent damage or loss.
- Consult a Repair Guide Specific to Your Model: While this guide provides general principles, finding a video or written tutorial tailored to your specific phone model is highly recommended. These often highlight unique screw placements, hidden clips, or specific adhesive points.
- Work on a Clean, Well-Lit Surface: A clear workspace prevents parts from rolling away and ensures you can see what you are doing.
Opening the Device
- Accessing the Back Panel/Front Screen: The method for opening a phone varies significantly between manufacturers and models.
- Rear Panel Removal: Many modern phones have a glass or plastic back panel that is adhered or held by screws. If adhered, gently apply heat around the edges to soften the adhesive. Then, use a suction cup to lift a corner and plastic opening tools to carefully slice through the adhesive. Be mindful of any ribbon cables that might be attached to the back panel.
- Front Screen Removal: Some phones, particularly older models or certain Android devices, require the front screen to be removed first. This often involves removing screws from the bottom or sides of the phone, followed by carefully prying the screen away from the frame. Again, heat may be necessary to soften adhesive.
Disconnecting Internal Components
- Locate and Remove Screws: Once the outer casing is open, you will encounter a network of tiny screws holding internal components in place. Use your precision screwdriver set and keep track of which screw goes where. Often, screws of the same length are used in one area, but variations can exist. Using a magnetic mat with a grid or sketching a diagram of screw locations can be beneficial.
- Carefully Pry Open Connectors: Ribbon cables connect various components like the battery, screen, and cameras to the motherboard. These connectors are usually secured by small latches or friction. Use a plastic spudger to gently lift the latches or slide the cable out. Never pull on the cable itself.
- Disconnect the Battery First: This is a critical safety step. Always disconnect the battery before disconnecting any other internal components. This prevents accidental short circuits. The battery connector is typically a small, flat cable.
- Disconnect Screen Ribbon Cable(s): The cable(s) connecting the display and digitizer to the motherboard will need to be disconnected. Exercise extreme caution, as these are often the most delicate cables.
Removing the Damaged Screen
With the internal components safely disconnected, the focus shifts to the removal of the fractured display. This stage requires a steady hand and meticulousness.
Removing the Old Screen
- Apply Heat (If Necessary): If the screen is held in place by adhesive, gently apply heat around the perimeter of the screen using a heat gun or hair dryer on a low setting. Aim to soften the adhesive without overheating the device. Hold the heat source a few inches away and move it constantly.
- Use Suction Cup and Opening Tools: Once the adhesive is softened, attach a suction cup to the undamaged portion of the screen, as close to the edge as possible. Gently pull upwards to create a small gap. Insert a thin plastic opening pick or spudger into this gap.
- Slice Through Adhesive: Carefully slide the plastic tool along the edges of the screen, working your way around the device. You will feel resistance as the adhesive is being separated. Be patient and avoid forcing the tool, which could damage the frame or underlying components.
- Watch for Cable Routing: As you lift the screen, be acutely aware of any ribbon cables that might still be attached. Some screens are connected by multiple cables, and you do not want to tear them. Lift the screen slowly and carefully, inspecting for any unseen connections.
- Remove Remaining Adhesive: Once the old screen is removed, use a plastic scraper or razor blade (with extreme caution and at a shallow angle) to meticulously remove all traces of old adhesive from the frame. Isopropyl alcohol can also be used to dissolve stubborn residue. A clean, adhesive-free surface is essential for the new screen to adhere properly.
If you’re considering repairing a cracked phone screen yourself, you might find it helpful to read a related article that offers step-by-step instructions and tips for a successful fix. This resource can guide you through the necessary tools and techniques to restore your device to its former glory. For more detailed information, check out this informative piece on how to repair your phone screen effectively by visiting this link.
Installing the New Screen and Reassembly
| Step | Task | Tools Needed | Estimated Time | Difficulty Level | Success Rate (%) |
|---|---|---|---|---|---|
| 1 | Power off the phone | None | 2 minutes | Easy | 100 |
| 2 | Remove SIM card tray | SIM ejector tool or paperclip | 3 minutes | Easy | 100 |
| 3 | Heat the edges to soften adhesive | Heat gun or hair dryer | 5 minutes | Medium | 90 |
| 4 | Use a suction cup and plastic picks to lift screen | Suction cup, plastic picks | 10 minutes | Medium | 85 |
| 5 | Disconnect screen cables carefully | Plastic spudger | 5 minutes | Hard | 80 |
| 6 | Remove broken screen | None (after disconnecting cables) | 5 minutes | Medium | 90 |
| 7 | Install new screen and reconnect cables | Plastic spudger | 10 minutes | Hard | 85 |
| 8 | Test new screen functionality | None | 3 minutes | Easy | 95 |
| 9 | Seal the phone and reinsert SIM tray | Adhesive strips | 5 minutes | Medium | 90 |
The reassembly process is essentially the reverse of disassembly, but with the added complexity of ensuring all connections are secure and parts are properly aligned.
Installing the New Screen
- Prepare the Frame for the New Screen: Ensure the frame is completely clean of old adhesive and debris. Apply new, pre-cut adhesive strips or a thin bead of B-7000 adhesive (a strong, flexible adhesive commonly used in phone repair) around the perimeter of the frame where the new screen will sit. If using liquid adhesive, work quickly but precisely.
- Connect the New Screen’s Ribbon Cables: Carefully align the ribbon cables of the new screen with their corresponding connectors on the motherboard and gently push them into place. Ensure they are fully seated. You should feel a slight click or resistance when they are properly connected. Do not force them.
- Test the New Screen Before Final Sealing: Crucially, before fully adhering the new screen and reassembling the rest of the device, temporarily reconnect the battery and power on the phone. Test the touch functionality across the entire screen and check for any display anomalies. If there are issues, disconnect the battery again and reseat the connections. This pre-adhesion testing can save you the frustration of having to re-open a glued-shut device.
- Position and Adhere the New Screen: Once tested and confirmed to be working, carefully align the new screen with the frame. Gently press down around the edges to ensure the adhesive makes good contact.
Reassembly
- Reconnect All Internal Components: Reconnect all ribbon cables and components in the reverse order of disconnection. Ensure all screws are returned to their original positions. This is where your organized screw collection, or diagram, becomes invaluable.
- Reconnect the Battery: The final internal connection to be made before closing the device should be the battery.
- Close the Device: Carefully align the back panel or front screen assembly and press it into place. If adhesive was used, you may need to apply gentle, even pressure around the edges for a period to ensure a proper bond. Some professionals use specialized clamps for this.
- Reinstall SIM and SD Cards: Once the device is fully reassembled, reinsert your SIM and SD cards.
- Power On and Final Testing: Power on the device and perform a comprehensive test of all functionalities, including touch, display, cameras, speakers, and network connectivity.
Post-Repair Considerations and Maintenance
The repair is complete, but your responsibility as the device’s steward continues. Regular care and attention will help prolong the life of your newly repaired screen.
Protecting Your Repaired Screen
- Apply a Screen Protector: Immediately after installation, apply a high-quality tempered glass or plastic screen protector. This provides an additional layer of defense against future scratches and impacts. It is like a shield for your repaired gem.
- Use a Protective Case: A sturdy phone case will absorb shock from accidental drops and prevent direct impact on the screen. Opt for cases with raised bezels that offer extra protection for the display.
- Handle with Care: Be mindful of where you place your phone. Avoid placing it face down on rough surfaces or in pockets where it might be subjected to pressure or friction.
Potential Issues and Troubleshooting
- Ghost Touches or Unresponsiveness: If you experience intermittent touch issues after the repair, it could be due to a slightly misaligned or not-fully-seated screen connector, or even static interference. Reopening the device and reseating the cables might resolve this. Ensure the replacement screen itself is not defective.
- Display Artifacts: Lines, dead pixels, or color distortions after installation usually indicate a damaged ribbon cable connection or a faulty replacement display. Again, reseating the cable or, if the problem persists, replacing the screen with a new one is the course of action.
- Battery Issues: If the battery was removed during the repair, ensure it was reconnected properly. Sometimes, if the battery was removed for an extended period, the phone might require a full charge cycle to recalibrate.
When to Seek Professional Help
While this guide aims to empower DIY enthusiasts, there are times when professional intervention is the wiser choice.
- Complex Models: Some waterproof or ultra-thin devices have highly intricate internal structures that make DIY repair exceptionally challenging and prone to error.
- Lack of Confidence: If you feel uncomfortable at any stage of the process or lack the necessary fine motor skills, it is better to entrust the repair to a qualified technician.
- Persistent Problems: If you have attempted the repair and are still facing issues, a professional repair shop has specialized tools and diagnostics to pinpoint and resolve the problem.
- Warranty Concerns: Performing DIY repairs on a device still under warranty will almost certainly void it.
Repairing a cracked phone screen is a rewarding endeavor that can save money and extend the life of your device. By approaching the task with diligence, proper tools, and a methodical mindset, you can successfully bring your fractured portal back to its former, pristine glory.
FAQs
1. What tools do I need to repair a cracked phone screen myself?
To repair a cracked phone screen yourself, you typically need a replacement screen, a small screwdriver set, plastic prying tools, tweezers, adhesive strips or glue, and a suction cup. Some repairs may also require a heat gun or hairdryer to soften adhesive.
2. Is it safe to repair a cracked phone screen on my own?
Repairing a cracked phone screen yourself can be safe if you follow proper instructions and take precautions such as powering off the device, working in a clean area, and handling components carefully. However, there is a risk of further damage or voiding warranties.
3. How long does it usually take to fix a cracked phone screen?
The time to repair a cracked phone screen varies depending on your experience and the phone model but generally takes between 30 minutes to 2 hours.
4. Can I use any replacement screen for my phone model?
No, replacement screens must be compatible with your specific phone model to ensure proper fit and functionality. Using an incompatible screen can cause issues with touch sensitivity or display quality.
5. What should I do if my phone screen is cracked but still responsive?
If the screen is cracked but still responsive, you can continue using it temporarily. However, it is advisable to repair or replace the screen soon to prevent further damage and potential injury from glass shards.