
Removing lead from your old home’s pipes is a critical task for safeguarding your health and the integrity of your water supply. Many older homes, built before the widespread understanding of lead’s toxicity, incorporated lead in their plumbing systems. This can include lead service lines connecting your home to the municipal water main, lead pipes within the walls, and lead solder used to join copper pipes. Over time, lead can leach into your drinking water, posing serious health risks, especially to children and pregnant women. This guide will walk you through the process of identifying and addressing lead in your home’s plumbing.
Before you embark on the journey of removing lead, it’s crucial to understand where it might be lurking. Think of your home’s plumbing as a circulatory system, and lead as a silent contaminant that can enter the bloodstream of your household. Identifying the presence and extent of lead is the foundational step.
Recognizing the Likelihood of Lead Plumbing
The age of your home is the most significant indicator of potential lead plumbing.
Homes Built Before 1986
Generally, homes constructed before 1986 are at a higher risk for lead plumbing. This year marked a significant shift in regulations, with the U.S. Congress passing the Lead Contamination Control Act, which banned the use of lead solder in plumbing. However, lead pipes themselves were often installed for decades prior to this.
Homes Built Between 1986 and 2000
While the ban on lead solder was in place, some building materials containing lead might still have been used in plumbing systems for a period. It’s also possible that older lead components remained in use even in newer constructions, especially if renovations were not comprehensive.
Homes Built After 2000
After 2000, the use of lead in plumbing materials became significantly less common and, in most regions, legally prohibited. However, it’s never a bad idea to confirm the materials used, especially if you are renovating an older property or encountering unexpected water quality issues.
Visual Inspection: A Detective’s First Clue
Visually inspecting your plumbing can provide preliminary clues. Imagine your pipes as arteries; their appearance can tell a story.
The Main Water Line Entry Point
The point where your water supply enters your home from the street is often a prime suspect. This is typically where the service line connects to your internal plumbing.
Curb Stops
The curb stop, a valve usually located at the property line or sidewalk, might be made of lead. This is often a gray, dull metal.
The Indoor Entry Point
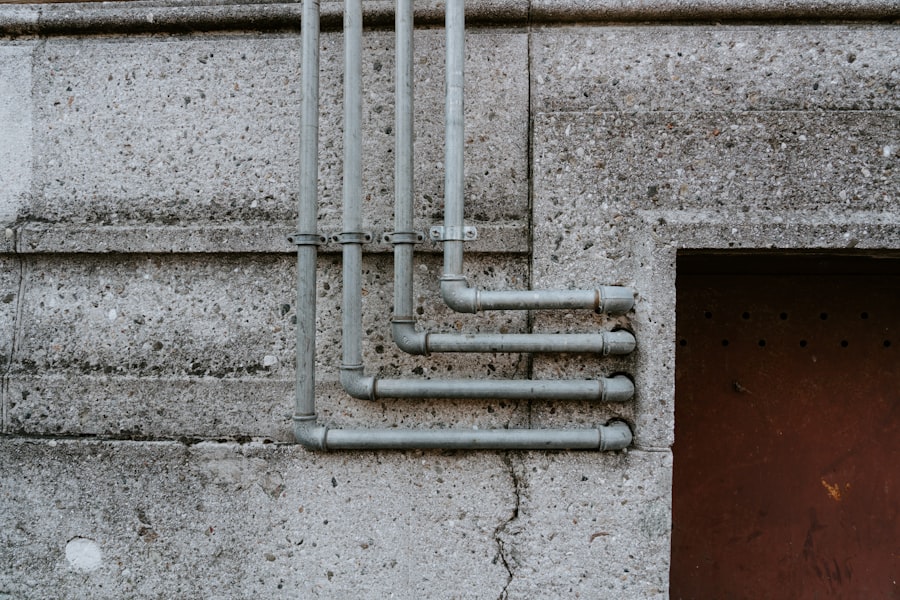
Follow the pipe from where it enters your basement or crawl space. If this pipe is a dull gray, unpainted, and relatively soft – you can scratch it with a coin – it could be lead. Copper pipes are usually a reddish-brown or greenish, and galvanized steel pipes are typically a dull gray but feel much harder and are often coated in rust.
Internal Plumbing Components
Lead can also be found within your home’s plumbing network.
Visible Pipes
In unfinished basements or crawl spaces, exposed pipes might still be part of your plumbing system. Look for similarly dull, gray, and easily scratchable pipes. Cast iron pipes are usually black and rough, while copper is distinctly reddish-brown.
Solder Joints
Before 1986, lead solder was commonly used to connect copper pipes. This solder will appear as a dull gray, sometimes bumpy, material around the joints. Newer solder is typically silver or gray and much smoother.
Professional Testing: The Definitive Diagnosis
While visual inspection offers clues, it’s not foolproof. Lead is an insidious enemy, often hiding in plain sight or disguised. Professional testing is the most reliable way to confirm the presence and concentration of lead. Think of professional testing as a medical scan to diagnose the illness accurately.
Water Testing Kits
Commercial water testing kits can provide a quick indication of lead levels in your tap water. These are readily available at hardware stores or online.
Reading and Interpreting Results
Follow the kit’s instructions meticulously for collecting samples. Then, carefully compare your results to the recommended or regulated levels for lead in drinking water. Be aware that these kits often test for dissolved lead at a specific point in time.
Certified Laboratory Testing
For the most accurate and comprehensive assessment, send water samples to a state-certified laboratory.
Obtaining a Chain of Custody Sample
Your local health department or water utility can often provide information on certified labs and how to collect samples properly. A chain-of-custody sample ensures that the integrity of your sample is maintained from collection to analysis.
Understanding the Report
The lab report will detail the exact concentration of lead in your water, usually measured in parts per billion (ppb). This information is crucial for determining the severity of the issue and the appropriate course of action.
Plumbing Material Testing
In some cases, you may need to have the actual plumbing materials tested.
XRF (X-ray Fluorescence) Testing
This non-destructive method can identify lead in paint and plumbing materials. A technician uses a handheld device to scan the pipes.
Sample Removal for Laboratory Analysis
If XRF testing is not feasible or conclusive, small sections of suspected lead pipes or solder can be removed and sent to a laboratory for more detailed analysis.
If you’re concerned about lead contamination from old home pipes, it’s essential to understand the proper methods for flushing your plumbing system. A related article that provides valuable insights on this topic can be found at this link. It offers practical steps and safety tips to help you effectively remove lead from your water supply, ensuring a healthier environment for you and your family.
The Remediation Roadmap: Strategies for Lead Pipe Removal
Once you’ve confirmed the presence of lead, it’s time to chart a course for its removal. This is where you become the architect of your home’s health, dismantling the old and building anew. The strategies vary depending on the extent of the lead contamination.
Replacing Lead Service Lines: The Most Comprehensive Solution
The lead service line, connecting your home to the municipal water main, is often the most significant source of lead contamination. Replacing this line is the most effective way to ensure lead-free water enters your home.
Understanding Your Responsibility
The responsibility for replacing the lead service line can vary by municipality. In many areas, homeowners are responsible for the portion of the line from the property line to their house, while the municipality handles the section from the main to the property line.
Communicating with Your Water Utility
Engage in open communication with your local water utility. They can provide information on their replacement programs, regulations, and any potential assistance or guidance they offer.
Understanding Local Ordinances
Familiarize yourself with any local ordinances or regulations pertaining to lead service line replacement. This will guide your planning and ensure compliance.
The Replacement Process: A Construction Endeavor
Replacing a lead service line is a significant construction project.
Excavation and Trenching
Accessing the service line typically requires excavation, either from your property line to your home or potentially from the street. This involves digging trenches to reach the buried pipe.
Disconnection and Removal
The old lead pipe will be disconnected from both the municipal main and your home’s internal plumbing and then carefully removed.
Installation of New Piping
A new, lead-free service line, typically made of copper or durable plastic (like PEX), will be installed in its place.
Backfilling and Restoration
Once the new line is in place and tested, the excavated areas will be backfilled, and the site will be restored.
Choosing a Qualified Contractor
This is not a DIY project for most homeowners. Hiring a licensed and insured contractor experienced in lead pipe replacement is paramount.
Verifying Licenses and Insurance
Ensure the contractor holds all necessary licenses and has adequate liability insurance.
Obtaining Multiple Bids
Shop around and obtain bids from several reputable contractors to compare costs and approaches.
Checking References
Request and thoroughly check references from past clients.
Replacing Lead Pipes Within Your Home: Guarding Your Internal Network
Lead pipes can also exist within your home’s walls, particularly in older homes. Replacing these is essential for a fully lead-free plumbing system.
Identifying Lead Pipes Internally
As mentioned in the identification section, visual inspection of exposed pipes in basements or crawl spaces is your first step. If you suspect lead pipes within walls, this becomes a more complex undertaking.
Professional Assessment for Internal Piping
A plumber can help you determine if internal pipes are lead and their extent.
Using Plumbing Diagrams
If available, plumbing diagrams of your home can help identify potential locations of older piping.
Invasive Inspections
In some cases, a plumber might need to make small, strategic openings in walls or ceilings to inspect the pipes directly.
The Replacement Process for Internal Plumbing
Replacing internal lead pipes often involves significant plumbing work.
Rerouting and Replacing Sections
This could involve rerouting plumbing lines or replacing entire sections of lead pipe with copper or PEX.
Minimizing Disruption
A skilled plumber will aim to minimize disruption to your living space during this process.
Addressing Lead Solder: A Joint Effort
Lead solder is another common component of older plumbing systems, used to join copper pipes. While less problematic than lead pipes, it can still leach lead into your water.
Symptoms of Lead Solder Issues
You might notice a dull gray, bumpy appearance at pipe joints.
The Option of Re-soldering
In some cases, particularly if the lead solder is accessible and the pipes are otherwise in good condition, it may be possible to re-solder joints using lead-free solder.
Professional Re-soldering
This is typically a job best left to a qualified plumber who can ensure proper sealing and prevent leaks.
Encapsulation or Replacement
If re-soldering is not feasible or the joints are a significant concern, the affected sections of pipe may need to be replaced.
Mitigating Lead Exposure: Interim Solutions and Best Practices
While you are planning or undertaking the permanent removal of lead plumbing, it’s crucial to implement measures to reduce your immediate exposure to lead in your drinking water. Think of these as temporary shields while you build a more robust defense.
Flushing Your Taps: A Simple, Effective Ritual
The longer water sits in lead pipes, the more lead it can absorb. Flushing your taps is a simple yet effective way to clear out stagnant water.
The “First Draw” Sample
For drinking and cooking, always use cold water that has been running for at least 30 seconds to a minute, especially after the water has been idle in the pipes for several hours (e.g., overnight).
Maximizing Lead Removal
This process essentially flushes out the water that has been in contact with lead components, replacing it with fresh water from the main.
Using the Flushed Water
The water flushed from your taps can still be used for non-drinking purposes, such as watering plants or flushing toilets.
Water Filtration Systems: A Protective Barrier
Water filters can significantly reduce the amount of lead in your drinking water.
Choosing the Right Filter Type
Not all filters are created equal. Look for filters certified by NSF International (National Sanitation Foundation) to reduce lead.
NSF/ANSI Standard 53
This standard specifically addresses health effects and material requirements for point-of-use devices, including those designed to remove lead.
Pitcher Filters vs. Faucet Filters vs. Whole-House Systems
- Pitcher Filters: Convenient for small amounts of water and easy to use, but often have a lower capacity and slower filtration rate.
- Faucet Filters: Attach directly to your faucet, providing filtered water on demand. They are generally more efficient than pitcher filters.
- Whole-House Systems: Filter all water entering your home, offering the most comprehensive protection. These are typically the most expensive but also the most effective for larger households.
Filter Maintenance: The Key to Effectiveness
Regular maintenance is critical for any filtration system to remain effective.
Replacing Filter Cartridges
Follow the manufacturer’s recommendations for replacing filter cartridges. Overused filters can become less effective or even release captured contaminants back into the water.
Cleaning and Sanitizing
Periodically clean and sanitize your filter housing or pitcher according to the manufacturer’s instructions.
Routine Testing and Monitoring: Staying Vigilant
Regular testing of your water is essential to ensure that your mitigation efforts are effective and to identify any new issues.
Periodic Water Testing
Even after replacing lead pipes, it’s advisable to test your water periodically, especially after significant plumbing work or if you notice any changes in water taste or appearance.
Retesting After Mitigation
After lead service lines or internal pipes have been replaced, retesting is crucial to confirm that the lead levels are within safe limits.
Understanding Changes in Water Quality
Pay attention to any changes in the taste, odor, or appearance of your water. These could be indicators of a recurring issue or a new problem.
The Long Game: Planning and Budgeting for Lead Pipe Remediation
Removing lead plumbing is not a minor undertaking. It requires careful planning, budgeting, and a commitment to your long-term health. Think of it as an investment in your home’s future and the well-being of its inhabitants.
Estimating the Costs: A Financial Blueprint
The cost of lead pipe remediation can vary significantly based on factors such as the extent of the lead contamination, the type of remediation needed, and local labor rates.
Lead Service Line Replacement Costs
This is often the most expensive component, potentially running into thousands or even tens of thousands of dollars, depending on the length and complexity of the excavation.
Internal Pipe Replacement Costs
The cost of replacing internal plumbing will depend on the amount of piping to be replaced and the accessibility of those pipes.
Water Filtration System Costs
The initial cost of a filtration system can range from under $50 for a basic pitcher to several thousand dollars for a whole-house system. Ongoing costs include replacement filter cartridges.
Exploring Potential Funding and Assistance
Several avenues may exist to help offset the costs of lead pipe removal.
Municipal and State Programs
Many municipalities and states offer grants, low-interest loans, or rebate programs to assist homeowners with lead service line replacement and other lead hazard control measures.
Researching Local Incentives
Actively research programs available in your specific area. Your local health department or water utility is a good starting point.
Federal Programs and Grants
Federal initiatives, such as those through the Environmental Protection Agency (EPA), may provide funding or guidance for lead remediation projects.
Insurance and Home Equity Loans
Inquire with your homeowner’s insurance provider to see if any portion of lead remediation is covered. Home equity loans or lines of credit can also be a viable option for financing significant home improvements.
Setting a Realistic Timeline: Patience as a Virtue
Lead pipe remediation is not typically an overnight fix. It’s a process that requires patience and a phased approach.
Prioritizing Your Efforts
If you have multiple sources of lead contamination (e.g., a lead service line and lead solder), prioritize the most critical issues first. Replacing the service line is often the top priority.
Phased Replacement
Consider a phased approach to replacing lead pipes within your home, addressing one area or section at a time as your budget allows.
Communicating with Contractors About Phased Work
Discuss the possibility of phased work with your chosen contractors to create a manageable plan.
Long-Term Maintenance and Monitoring: Sustaining a Healthy System
Once the lead pipes are removed, consistent maintenance and monitoring are key to ensuring your water remains safe and your plumbing system functions optimally.
Regular Plumbing Inspections
Schedule periodic inspections of your plumbing by a qualified professional to identify any potential issues before they become major problems.
Checking for Leaks and Corrosion
Inspect joints, valves, and pipes for any signs of leaks or corrosion.
Continued Water Testing
Maintain a routine of testing your water supply, especially after any significant plumbing work or if you notice any changes in water quality.
If you’re concerned about lead contamination in your drinking water due to old home pipes, it’s important to know how to effectively flush lead from your system. A helpful resource on this topic can be found in an article that provides detailed steps and safety tips for homeowners. For more information, you can read the article on flushing lead from pipes here. Taking the right precautions can ensure that your water is safe for you and your family.
The Future of Your Water: Embracing Lead-Free Living
| Step | Action | Details | Estimated Time | Effectiveness |
|---|---|---|---|---|
| 1 | Identify Lead Pipes | Check plumbing for lead pipes or solder; use a lead test kit if unsure. | 15-30 minutes | Essential for targeted flushing |
| 2 | Flush Cold Water | Run cold water taps for 5-10 minutes to clear stagnant water. | 5-10 minutes | Removes lead particles from standing water |
| 3 | Flush Hot Water | Run hot water taps for 5-10 minutes; hot water can dissolve more lead. | 5-10 minutes | Reduces lead exposure from hot water |
| 4 | Use Point-of-Use Filters | Install NSF-certified filters to remove lead at taps. | Installation: 30-60 minutes | Highly effective in reducing lead |
| 5 | Regular Maintenance | Flush pipes weekly if water is unused for long periods. | 5-10 minutes weekly | Prevents lead buildup |
| 6 | Consider Pipe Replacement | Replace lead pipes with copper or PEX for permanent solution. | Days to weeks | Eliminates lead risk |
Removing lead from your old home’s pipes is a significant undertaking, but it is a profoundly rewarding one. You are not just replacing pipes; you are investing in the health and well-being of your family for years to come. It’s about reclaiming the purity of your water, transforming it from a potential source of concern into a symbol of a healthy and vibrant home.
The Peace of Mind that Comes with Safe Water
Knowing that your family is drinking and cooking with water free from lead contamination provides invaluable peace of mind. This is an intangible benefit that underpins the entire endeavor.
Enhancing Your Home’s Value and Appeal
A home with updated, lead-free plumbing is a more attractive and valuable asset. It demonstrates a commitment to the property’s integrity and its occupants’ health, appealing to potential buyers and enhancing your current living experience.
Contributing to Public Health
By addressing lead plumbing in your home, you are also contributing to the broader effort of improving public health. Your actions, multiplied across communities, create a ripple effect of healthier living environments.
Embracing a Healthy Lifestyle
The commitment to removing lead is a testament to a proactive approach to health and wellness. It aligns with a broader understanding of environmental factors that impact our well-being, allowing you to embrace a healthier lifestyle within your own sanctuary.
The Legacy of Lead-Free Water
Consider the legacy you are building. By undertaking this crucial remediation, you are ensuring that future generations who inhabit your home will have access to safe, clean drinking water, free from the silent threat that once posed a risk. It’s a lasting gift, a testament to informed action and a commitment to a healthier future.
FAQs
Why is it important to flush lead from old home pipes?
Flushing lead from old home pipes is important because lead can leach into drinking water, posing serious health risks, especially to children and pregnant women. Removing or reducing lead exposure helps ensure safer, cleaner water.
How do I know if my home pipes contain lead?
Homes built before 1986 are more likely to have lead pipes, fixtures, or solder. You can check by inspecting visible pipes for markings or by having your water tested by a certified laboratory to detect lead levels.
What is the recommended method to flush lead from old pipes?
The recommended method is to run cold water from the tap for several minutes, typically 3 to 5 minutes, before using it for drinking or cooking. This helps clear out water that has been sitting in lead-containing pipes and reduces lead concentration.
Can flushing alone remove all lead from my water?
No, flushing reduces lead levels temporarily but does not eliminate lead from the plumbing system. For long-term safety, consider replacing lead pipes or using certified water filters designed to remove lead.
Are there any additional steps to reduce lead exposure from old pipes?
Yes, besides flushing, you can use cold water for consumption, install NSF-certified lead-removing filters, regularly test your water, and replace lead-containing plumbing components to minimize lead exposure.